Dev Blog - Making of the Chaos Spawn
In this Dev-Blog you will get a closer look at the process of how we created one of the most popular bosses in Vermintide 2: the Chaos Spawn. Johan, our Senior Character Artists at Fatshark will walk you through the entire process from concept art to the final product.

Hello!
My name is Johan and I’ve been working with Character Art at Fatshark for the last 10 years. I’m a huge GamesWorkshop fan so the last couple of years have been a blast! Actually working, very slowly, on assembling my own Adeptus Mechanicus army on the side.
At the end of August 2016, we had just finished the Chaos Marauder and Warrior for Vermintide 2 and that was pretty much it. We knew that we were going to need a big bad boss with Chaos affiliations to fill out that role. When our Art/Game Director, Anders De Geer, sent me an awesome concept for the chaos spawn I was very happy!
Concept Art of the Chaos Spawn
From the concept art we knew the size of the Chaos Spawn and the overall look. From this we had enough knowledge to cover a wide variation of gameplay elements that might pop up: grabbing with tentacles, biting/sucking with head appendage and etc.
The gameplay was worked on continuously during the character creation. We also needed to keep the belief that this was a human being that turned down a bad path a couple of times too many.

Punch like a big bad boss
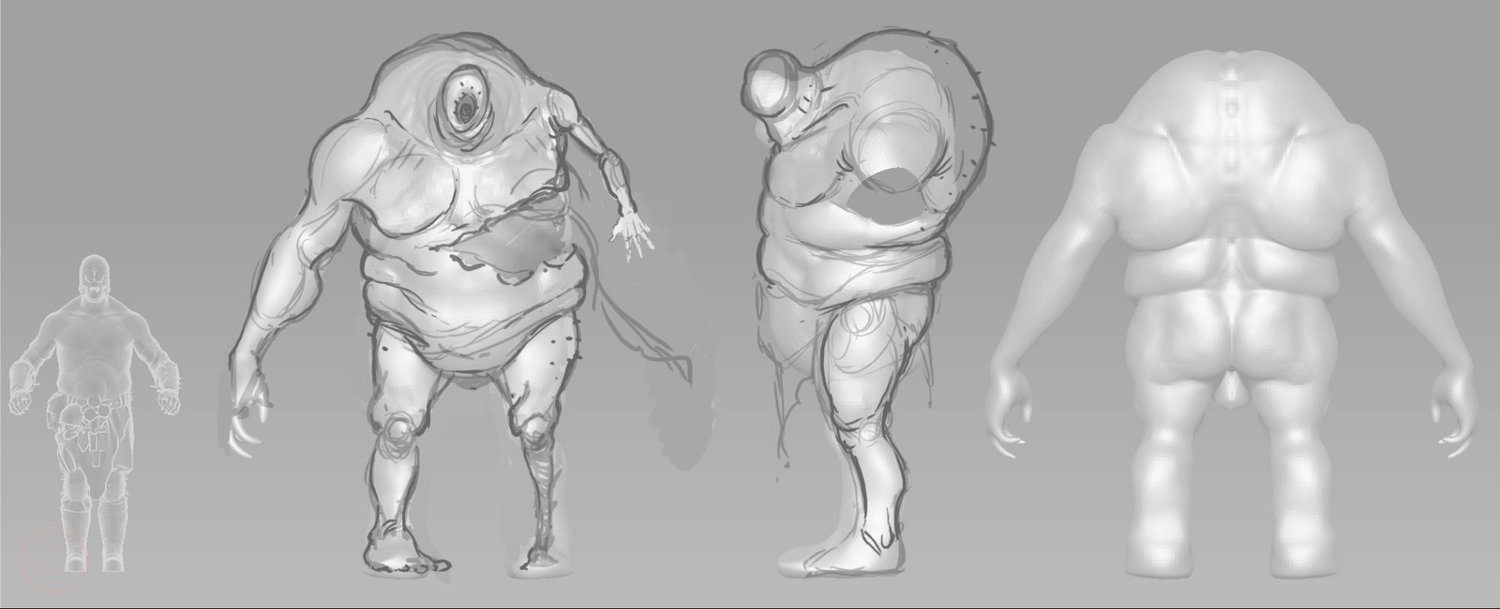
The first and most important thing was to decide the size of the spawn. Make it too small and it will not have a punch like a big bad boss. Make it too large and we would have problems with level design. It would've been sad if he couldn't fit through doors. I began with a rough first draft and sent it over to Anders for feedback and a quick lineart paintover
I started out from the Marauder model and just went bananas on it in Zbrush. I enlarged the model and started to edit in the Chaos Spawns distinct features based on the Concept Art. Here we also needed to decide how the “chest-mouth” would look, as well as the look of the side silhouette and back.
Baby Nurgle-steps
At this stage the overall shapes were getting there. We had asymmetry with the arms, “worm-face” and position for the tentacles. But we were still far away from the end result.
You can see I’ve started to slowly but surely work out the different parts. I took some photo references to help out with the sculpting of the spawn’s right arm. Especially, how the wrist to hand part looked in the pose. When stuck I always fall back on nature for help or to find inspiration. Usually, when we create characters we try and keep every joint at 50/50 in movement. That way we get a good base for animation to start from. But on this character we wanted the mesh to be quite dramatic from the start.


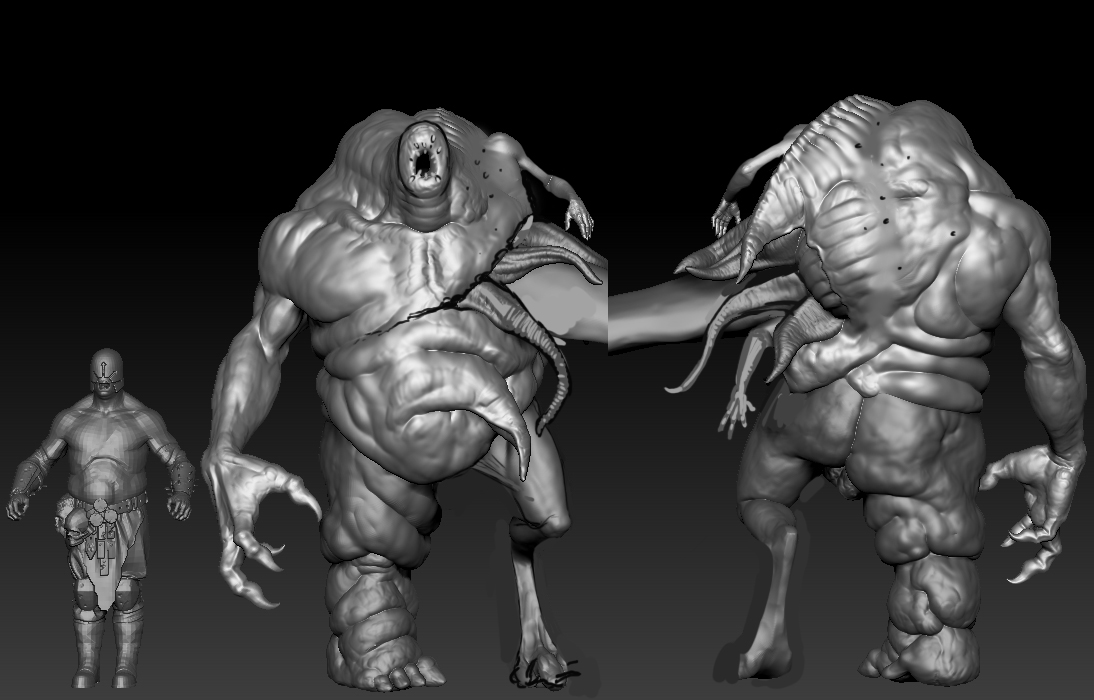
After a while I stopped for a sanity check with Anders to discuss the progress and if any further changes were needed. As you can see we had moved away from the concept a bit, which is not unusual. We wanted him to be a bit more “chaos”, and we decided that his legs should be quite different. Below, we have a paintover that focus on the looks of his left leg, face and “chest-mouth”, I also added more limbs to change the silhouette.
Me and Anders continuously worked back and forth to help out with the end result, and when in doubt technically we talked to the animators and riggers. It was also important to consider the gameplay: the tentacle was at this stage meant to be used for “grabbing” the players and holding them, as you experience it in the game today.
“HOW DO I BLEND FATTY TISSUE WITH GNARLY LEATHER ELEMENTS, BOILS, WOUNDS ,AND MUSCLE TISSUE INTO A MAGICAL NURGLE MIX?”
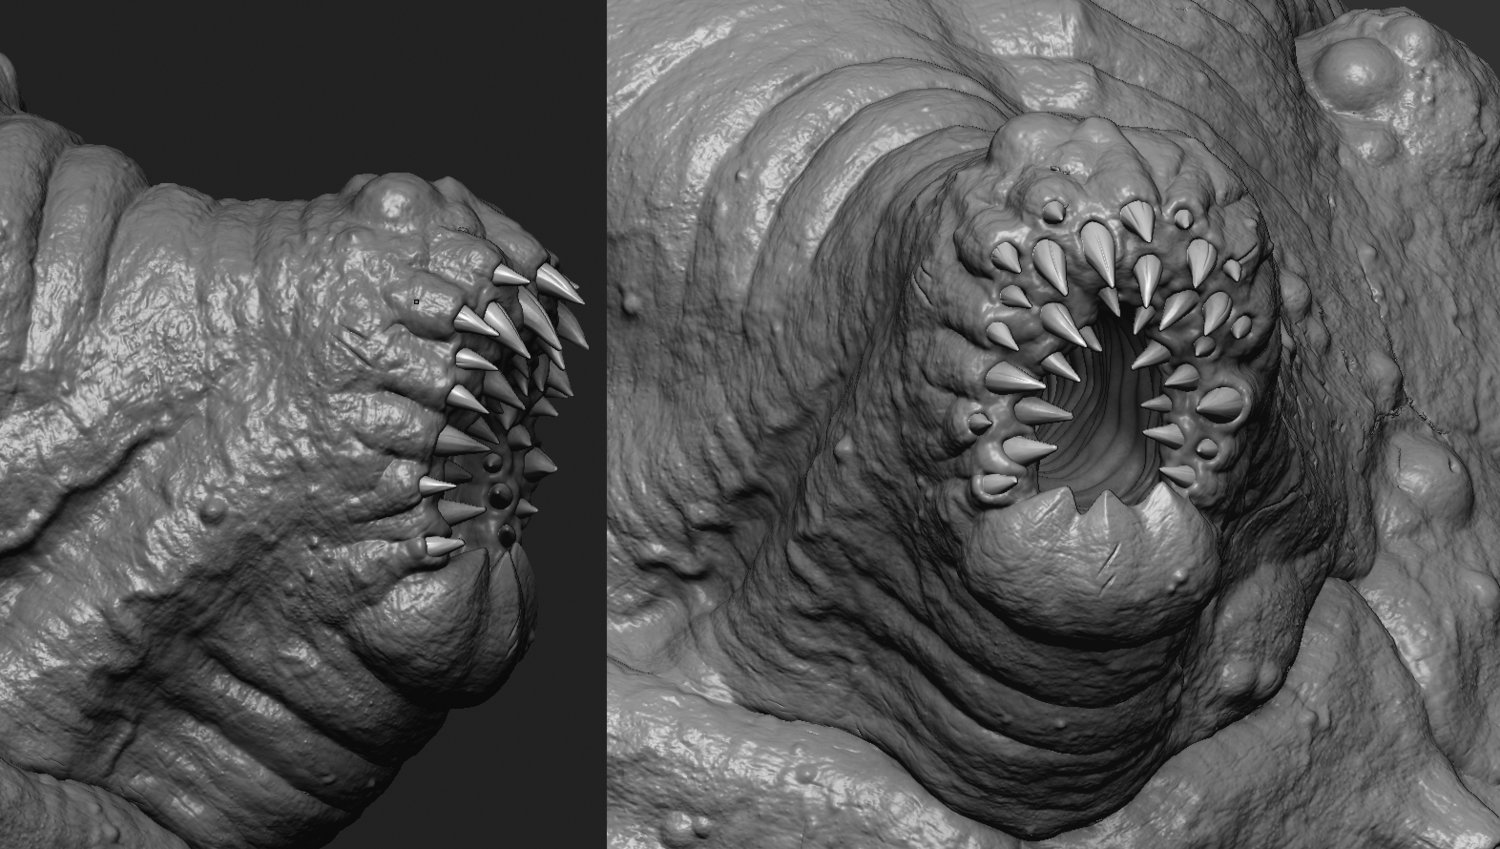
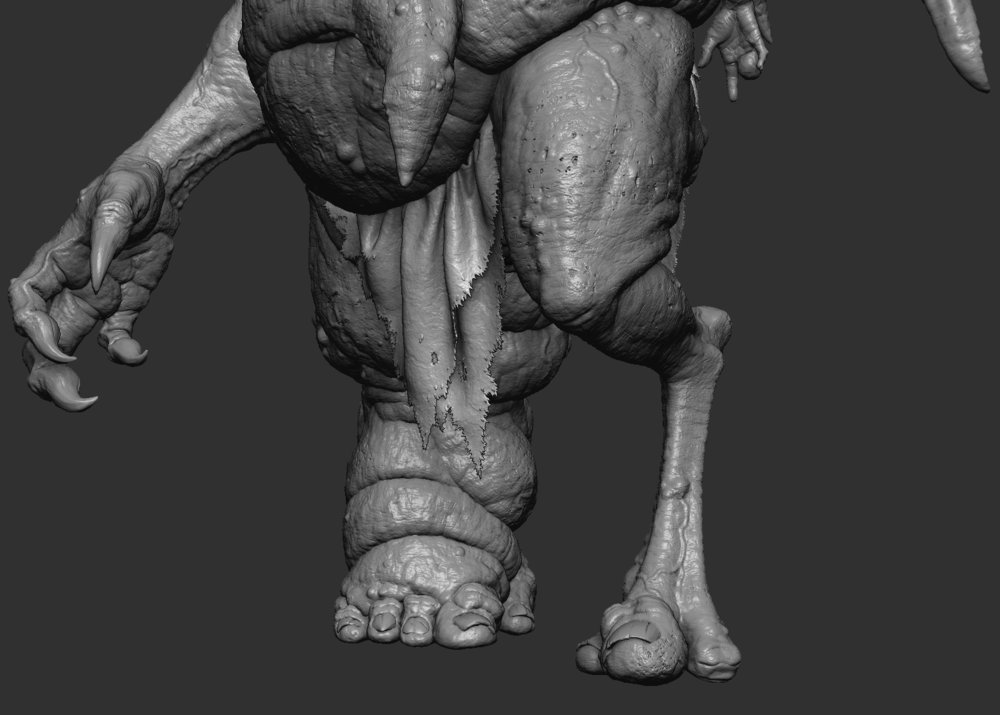
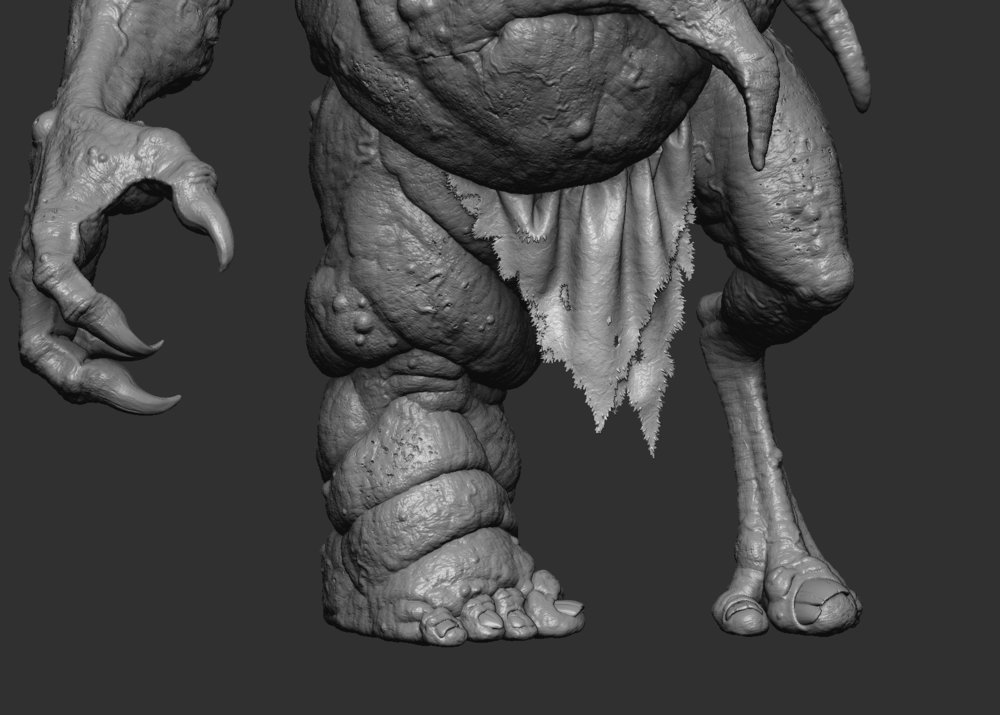
Below is the final high poly model in Zbrush. Creating the surface details and materials was a really fun and quite a repulsive process where I often asked myself; “How do I blend fatty tissue with gnarly leather elements, boils, wounds ,and muscle tissue into a magical Nurgle mix?”. To create this every part of him was thought through: from details like his mark of Nurgle in boils on his right chest to making his rib cage chaotic in the back by extending it outwards in an awkward fashion. I added an obscene breast to break up his chest even more. All of his hands/limbs never had 5 standard digits to highlight the effects of the Nurgle. I made a worm “body” for his head that flows over his left shoulder and ends in a tentacle at the back as well.
The big tentacle was built in this rigid pose because it was going to be rigged and animated, the smaller tentacles were not going to be animated so they could be sculpted in a more organic way. They also didn’t get the same leathery texture as the rest of the character - this is to give them a more “inner organ”-feeling.
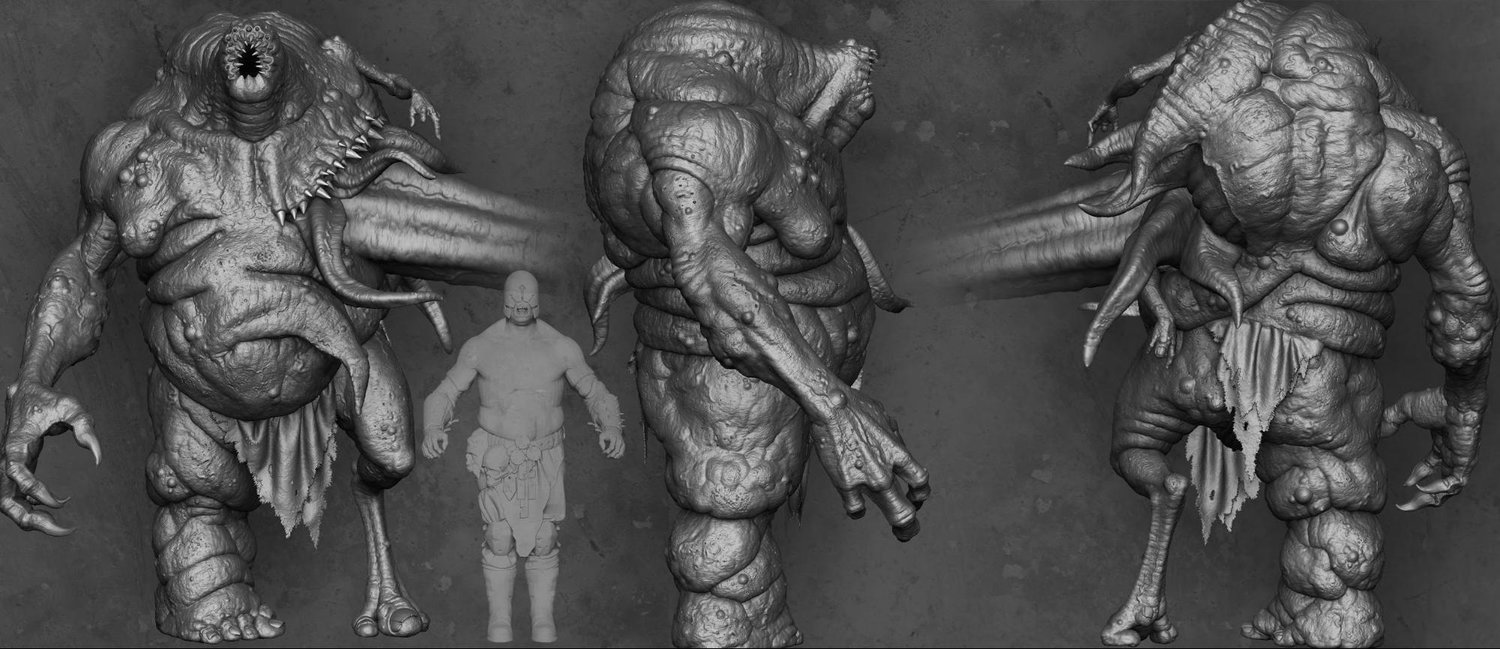

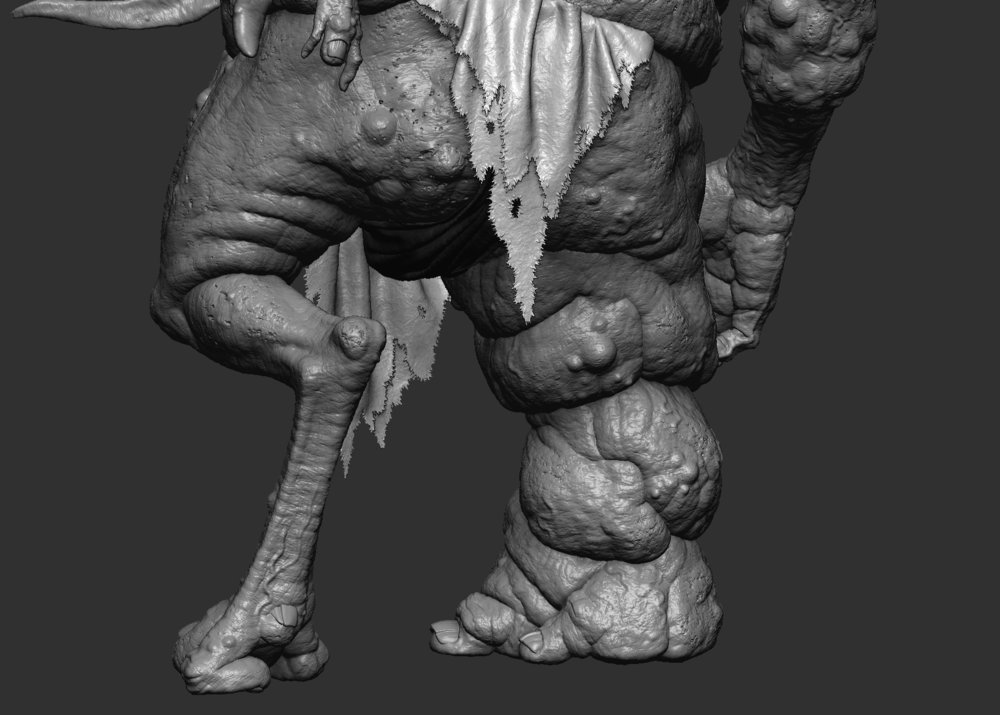
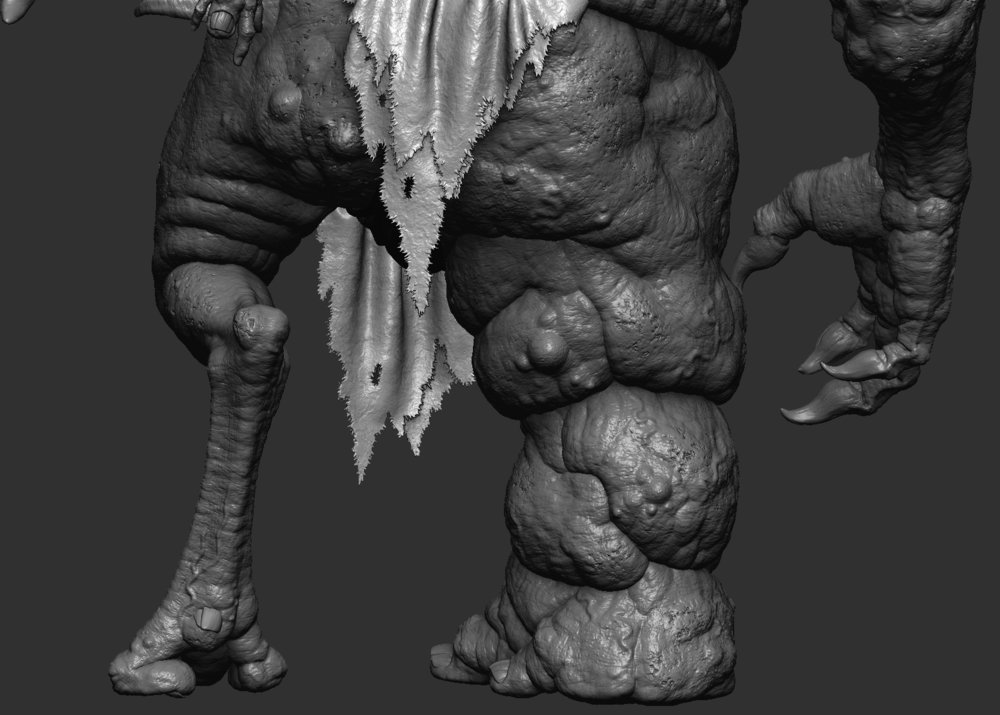
“THIS IS ACTUALLY THE ORIGINAL PERSON'S LEFT SHOULDER AND ARM. IT HAS BEEN MOVED AND DEFORMED DUE TO THE INFLUENCE OF THE CHAOS.”

We then began bringing it down from 75 million polygons to around 65 000. I decimated the mesh and brought it as manageable chunks into Maya. There I retopologized the mesh and then created the UV’s in UVlayout. Xnormals were used for all the baked textures we would need. Texturing was made with a mix of Photoshop, Zbrush and Substance Painter. I take great pride in doing a clean and animation friendly mesh with a great UV to help out with texturing.

THE FINISHED CHAOS SPAWN
This is the finished chaos spawn in “T-pose” in the game engine. We decided to go with a sick human skin tone but with gangrene in his feet and arm, just to give the texture some variation. The tentacles got their own shader to give it more of a worm-flesh-feeling. All boils and sores got special love treatment from grandfather Nurgle.
All in all, a really fun project to work on!
/Johan
